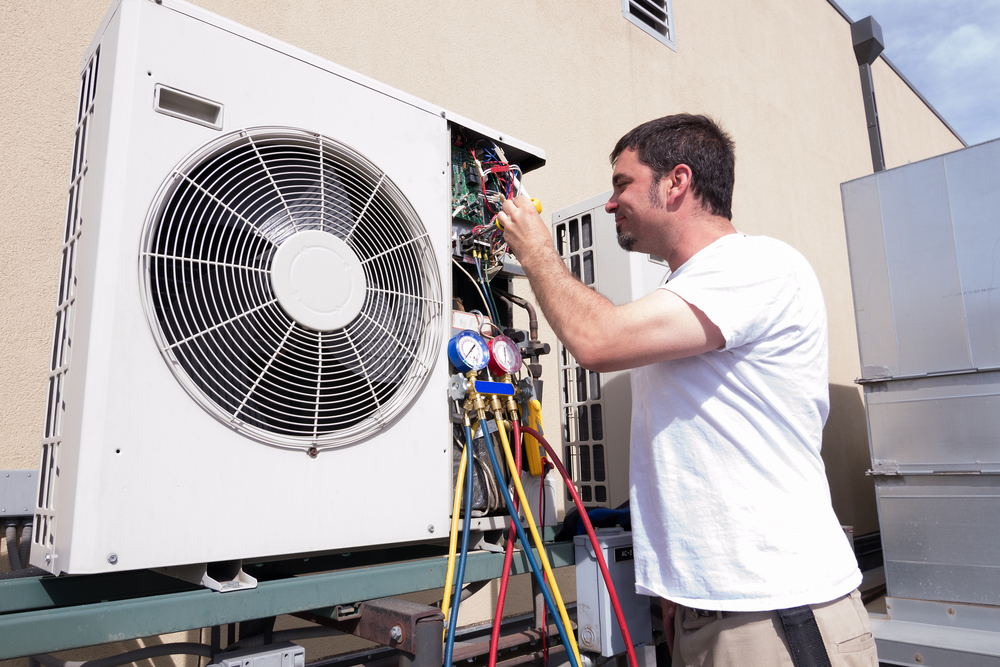
HVAC professional at Pro Master Heating & Air Conditioning is in high demand during peak heating and cooling seasons. They must be prepared to work heavy amounts of overtime during these times.
The “H” in HVAC stands for heating, and the “V” stands for ventilation. HVAC systems are used to heat and cool homes and businesses, as well as remove smoke, odors, moisture, dust, and airborne bacteria from indoor spaces.
A thermostat is the brain behind your HVAC system. It is responsible for regulating the air temperature in your home and can be set to different times and temperatures throughout the day based on your schedule. It is also responsible for determining how much energy your HVAC system will use to cool your house. This is important because overworking your HVAC unit can lead to premature wear and tear as well as high utility bills.
A traditional mechanical thermostat works by using the fact that most things expand when they get hot and shrink when they get cold. When the bimetallic strip on a mechanical thermostat heats up, it bends slightly, which creates a bridge that carries electricity and turns on the heating system. When the strip cools, it bends less, and the electricity is cut off, turning off the heater.
Most modern programmable thermostats have more sophisticated electrical systems that work the same way, except they usually have a screen to display the current time and date. They can be programmed to turn on and off at different times of the day, as well as to turn on at a specific time before you get home so that your HVAC can start cooling your house down before you arrive.
The way to do this is to set the system up to “cool” first by using the up and down arrows on the faceplate of the thermostat to cycle through until you reach it. Then, when it is time to return home, simply set the HVAC to “return,” and the system will be turned on so that your house will be nice and cool when you arrive.
Furnace
Furnaces are the heart of central heating systems. They produce and distribute heat to your home through ductwork and a blower. Furnaces can be powered by natural gas, liquid propane, or heating oil. Most furnaces create heat through combustion. Some use electric resistance elements to convert electricity into heat. A variety of fuels can be used to power furnaces, including wood, coal, trash, paper, and natural gas, as well as whale oil for a brief period at the turn of the century.
The control system in your HVAC system communicates with your furnace to tell it when to turn on. When the thermostat senses that your home’s air temperature has dipped below a specific number, it sends a signal to the furnace. This signal prompts the gas valve to open and ignite the burner component underneath. The burners then heat a metal heat exchanger that helps transfer the thermal energy to your home’s air. The hot air is then blown by a blower through the house’s ductwork into the living spaces. The resulting combustion gases are then vented outside through vent piping.
There are different types of furnaces, including single-stage and two-stage models. Single-stage furnaces are always running at full speed, while two-stage furnaces operate at a lower speed when less heat is required. This means they are quieter and move a smaller volume of heated air at a higher velocity.
The type of flame your furnace produces is also important. It can affect how efficiently your home is heated and your HVAC system’s overall performance. There are six different types of flames: A, B, C, E, F, and G. Type A is the simplest, burning straight ahead like a candle. Type C burns ball-shaped and has a high swirl with hot reverse flow to avoid flame impingement. Type E has a convex flame that increases direct radiation, and type F is long and luminous without swirling for uniform coverage.
Evaporator Coil
The evaporator coil, positioned near the system fan in your indoor air conditioning unit, is an upright structure that usually looks like an “A.” Its panels and coiled tubes are made from metals like copper or aluminum because they’re good conductors of heat. The evaporator coil absorbs the heated air, turning it into cool vapor before sending it to the outdoor unit. The outdoor unit’s compressor then converts it back to liquid form. When it returns to the evaporator coil, it is ready for another cycle.
Like other parts of an AC, the evaporator coil can develop issues over time. Dirty coils can cause your system to use more energy to achieve the same cooling effect because it can’t efficiently absorb heat from your home. The coil can also become corroded due to airborne chemicals in your home, such as new carpets, paints, and cleaning products. Corrosion leads to tiny pinhole leaks in the coil. These leaks can be difficult to spot and are best resolved by a professional who performs regular inspections of your HVAC unit.
You may be able to do some maintenance on your own, such as washing the coil with a garden hose or replacing the dirty air filter. But you should leave the more serious issues, such as a refrigerant leak or frozen coil, to the professionals.
Be sure to turn off your air conditioner before accessing the evaporator coil, and always wear protective gloves and a face mask. AC refrigerant is a toxic chemical and could be dangerous to inhale or touch.
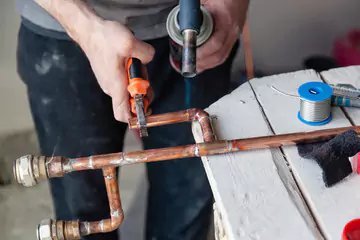
Ductwork
Ductwork is a series of tubes that deliver air from your heating and cooling systems to all areas of your home. It can be made from a variety of materials and is commonly constructed of sheet metal. Rigid steel ducts are the most common, but aluminum is also used in some applications. Ducts are usually attached to vents, which are openings in the walls and ceiling that allow heated or cooled air to flow into the living spaces of the home.
When a home’s ductwork isn’t properly installed, sealed, and maintained, it can leak air and reduce efficiency. Leaking ducts can also lead to higher energy bills and rooms that don’t stay at an even temperature.
The duct system includes the duct trunk and pipes that direct air to various rooms in your home, as well as the supply registers (openings in the wall or ceiling) and return grilles that allow stale air to be pushed back into the duct system. The stale air is then recirculated or sent out through the flue.
There are several different kinds of ducts available, including round metal ducts, rectangular metal ducts, and flexible insulated ducts. In many cases, a specialized sheet metal shop can fabricate custom or non-standard shapes of ductwork.
When a homeowner is installing his own ductwork, he must be careful to choose the proper fittings and materials. It is recommended that he use galvanized mild steel for his fabrications, as it is cheaper than stainless steel and will withstand the elements more effectively. He should also purchase a 24’’ folding bar, a pair of metal snips, and a tin hammer. To begin, he should lay out half of his square duct board on the table and then cut it to size using the snips.
Air Filters
The air filter in your furnace, air conditioner, and ductwork is a crucial but often overlooked component. It may look like a simple cardboard box of fibers or pleated material, but it’s vital to the health of your HVAC system and indoor comfort.
Air filters are designed to prevent contaminants from damaging your HVAC equipment and blocking the flow of clean, conditioned air through the ducts. They usually feature a pleated surface to provide more surfaces for trapping particulate matter, but they also come in a variety of materials, such as fiberglass, electrostatic, and HEPA. They’re rated according to their ability to filter out different particles in the air, with a standard rating of 1 to 16 developed by the Society of Heating, Refrigerating, and Air-Conditioning Engineers.
How your filter grabs those particles depends on three physical processes. The first is inertial impaction. Particles smaller than the mesh openings in your filters are forced to ram into them at high speeds, causing them to stick and be caught. This works for particles up to one micron.
A slightly more complex process, interception, uses static electricity to attract particles to the filter fibers. It’s the same process that allows you to shock your sibling by scooting your socks across the carpet, and some filters are deliberately charged to maximize this effect.
You can choose from a wide range of filtration options to suit your home’s unique needs, with standard MERV ratings between 1 and 16. A MERV rating of 9 or higher is ideal for most homes, and higher-rated filters capture even more small particles, including bacteria and viruses. Smart filters, such as 3M’s Filtrete, are also available and will send you an alert on your phone when it’s time to change the filter.
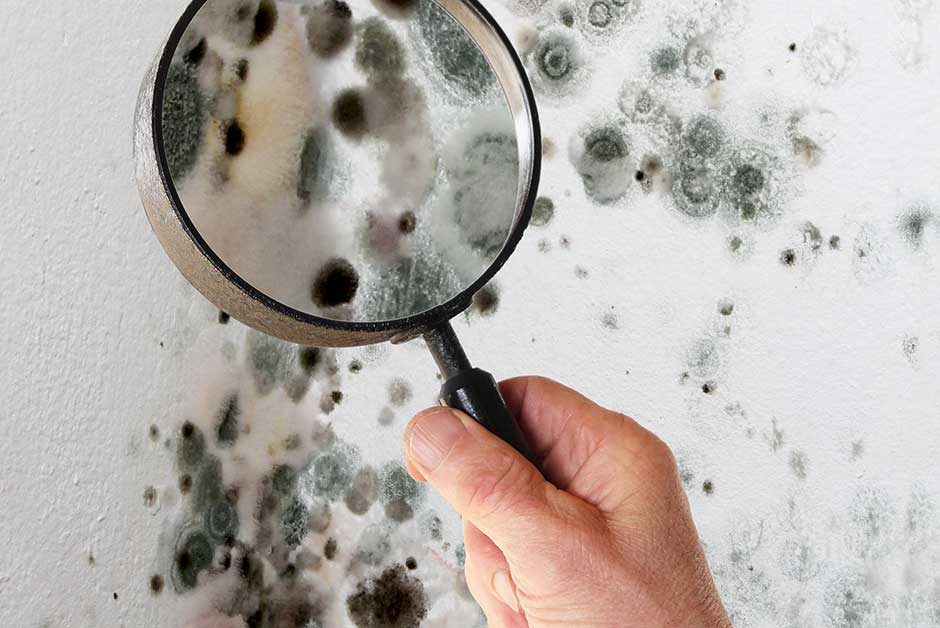
 After removing the mold, you will need to get the proper tools and materials to repair the property. In some cases, you may have to replace the damaged materials with new ones, such as carpet and drywall. Depending on the situation, you may need to hire Mold Removal company to complete the job. These companies will provide you with a written estimate for the work, including what materials you’ll need to replace. If you aren’t comfortable with this, you can opt for DIY options or use a mold removal service.